BALLBACK INSTALLATION AND USE
Ballback basketball return units are designed to fit the
most popular, and economical “standard design home rims” that have a 5”
wide mounting arrangement for matching conventional style backboards.
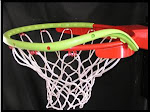
To install….Tilt
and Lift the Ballback unit behind the net …so the looping fingers easily straddle
the rim mounting width, and snap over the rim and swinging freely… facing
forward.
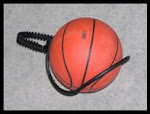
The original Ballback (with an added spine) has shoulders
that bottom beneath the bent mounting plate of the standard home rim.
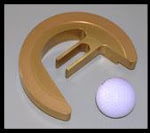
The pro model has longer reaching hooks that span that 5”
mounting area when springs or boxes may interfere. So the Pro fits more
elaborate home rims…as well as the basic models.
The Pro shoulders
will bottom below the rim mounting. The pro simply hangs a little lower and it
has a more modern look.
Upon ball contact, each unit should swing freely, bottom against the rim mounting, and then recoil
to kick the ball back towards the free throw line.
Ballbacks can reward you with a returned ball. Your great shots, 10 to 2 … can come right
back to you. Other shots may simply bounce
back… at least staying on the court.
So….… you can shoot more hoops, improve skills and have more
fun…. even when you’re all alone.
But…Always remove your Ballback during games or other
activities. Don’t manhandle or misuse it. And don’t dunk on it, Don’t heave
errant shots. Don’t grab or hang on that Ballback. C’mon, it’s plastic. Respect it.
So Please….mount your Ballback correctly…fitting on the
proper home rim…facing forward….swinging freely upon ball contact…..and
allowing it to kick the ball back to you.
Then, you’ll enjoy it …and have more fun….for a long time. Enjoy!